

How To Install Language Pack Windows 8
Z7_3054ICK0KGTE30AQO5O3KA30N0
hp-concentra-wrapper-portlet
![]() Actions
Actions
HP PCs - Changing Languages (Windows 8)
This document pertains to HP and Compaq computers and tablets with Windows 8.
The language on an HP computer is part of the product design. For the best computing experience, buy a computer that matches your chief language. If you already have a computer that does not match your main language and you lot cannot detect or install a Language Pack, you lot might be able to install a new full version of Windows that matches your main language.
caution:If you change the linguistic communication and so contact HP Support, HP might not exist able to aid if the language is different than the language that shipped with the product. The language is part of the product blueprint, and HP support services are set up to match the blueprint of the product.
In Windows 8, you lot tin can change the display language in apps, settings, menus, and other areas in Windows. People sharing a computer can each select unlike brandish languages for their user accounts, or i person tin can add multiple languages to one user account and switch between them.
note:Installing multiple linguistic communication packs might affect how much hd infinite is bachelor, as well equally organisation performance. Install merely the language packs you lot will use.
Finding and installing a language pack
Over a hundred languages are listed in the Language department in Control Console. Many of the languages have a number of dialects, which are chosen regional variants in Windows. If you add a language but find that no linguistic communication pack is available for download, check periodically to meet if Microsoft has created a language pack for the linguistic communication you want.
Follow the steps below to change languages or install boosted languages.
-
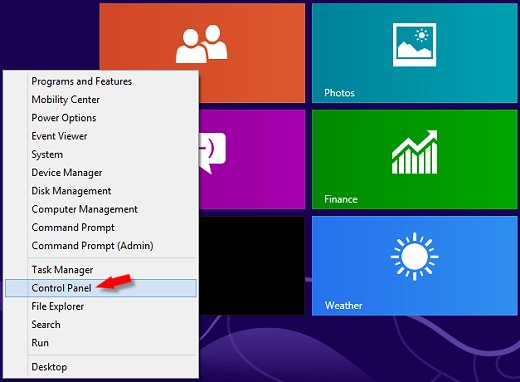
Move the mouse pointer to the lower left corner of the screen, right-click, and select Control Console from the menu.
Figure : Control panel
-
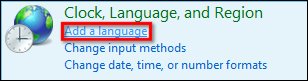
Under Clock, Language, and Region, click Add together a language.
Figure : Clock, Linguistic communication, and Region
-
In the Language window, click the Add a language button.
Figure : Language window

-
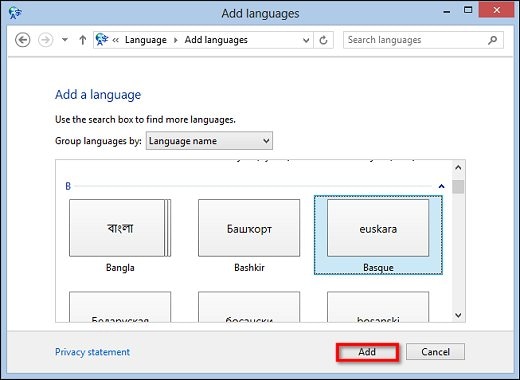
On the Add languages window, curlicue down to find the linguistic communication you want.
-
Select the language: If the language has no regional variants, click Add together.
Effigy : Language with no regional variants
-
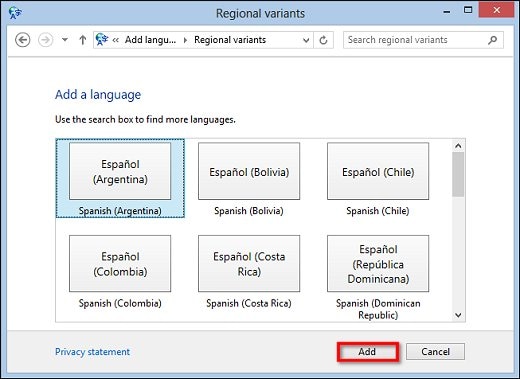
If the language has multiple regional variants, click Open, select the regional variant you want, so click Add.
Figure : Language that has regional variants
The Language window reopens with the new language on the list.
-
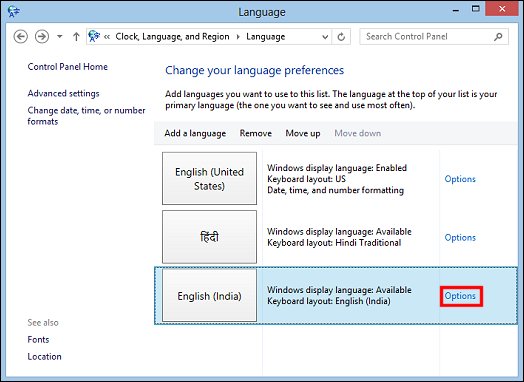
Click Options adjacent to the linguistic communication you are calculation.
Figure : Options for adding languages
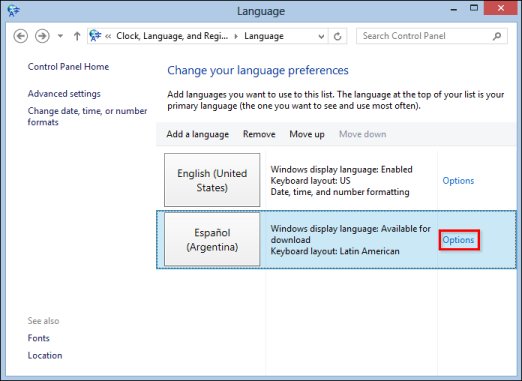
The Language options window opens with any available language packs listed nether Windows display language.
-
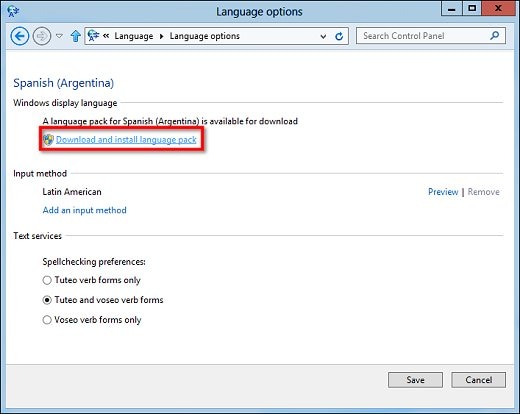
If a language pack is available, click Download and install linguistic communication pack.
Figure : Language pack available for download
-
If prompted, sign in as an administrator.
-
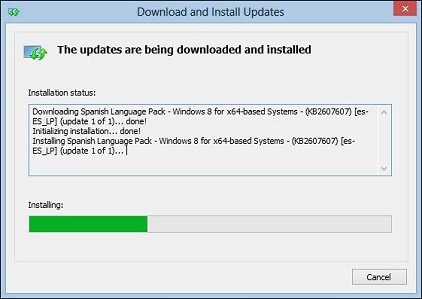
When prompted, click Yes to let Microsoft Windows Linguistic communication Pack Installer to make changes to the computer.
The language pack begins to install. This might take several minutes.
Figure : Linguistic communication pack installation
The new language is available to everyone who shares the computer.
Changing the display language
In one case the language pack has downloaded, you can switch between display languages.
-
Sign in to your user account.
-
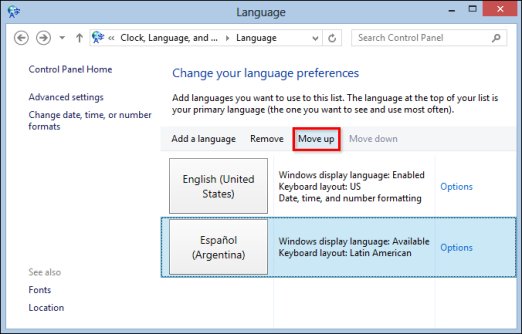
In the Language window, select the language yous want to set as a primary language and click Movement upwardly until the linguistic communication is at the top of the list.
Figure : Display language preference
-
Restart the computer.
-
Log in to your account.
The figurer restarts with the new display language appearing in apps, settings, menus, and other areas in Windows.
-
To switch between languages, open the Language window, move the desired language to the top of the list, and and then restart the reckoner.
Other people using the computer can choose different primary display languages past signing in to their accounts, post-obit the steps in Finding and installing a language pack, so post-obit the steps in this section.
Changing the keyboard language
Once a language is on the language list, an appropriate input method is automatically added. You lot can add input methods in other languages or select a different keyboard layout.
-
Move the mouse arrow to the lower left corner of the screen, right-click, and select Command Panel from the card.
-
Nether Clock, Language, and Region, click Change input methods.
Figure : Clock, Language, and Region

The Linguistic communication window opens.
-
To add a new keyboard layout, click Options next to the language.
Figure : Options for adding input methods
-
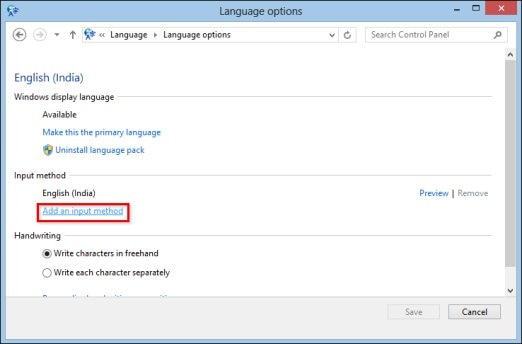
On the Language options window, click Add an input method.
Figure : Add together an input method in Linguistic communication options
-
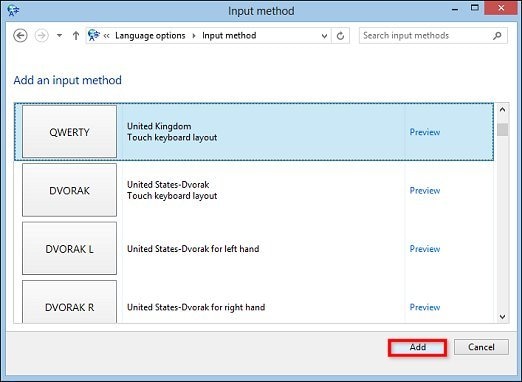
On the Input method window, select the desired keyboard linguistic communication and layout from the listing, and and so click Add.
Figure : Keyboard language and layout
-
On the Linguistic communication options window, click Save.
Once you've chosen keyboard languages, y'all tin switch between keyboards by pressing the Windows
 + SPACE BAR keys.
annotation:
Switching between keyboards merely changes the language of the input. Follow the steps in Irresolute the display language to alter the display language for apps, settings, menus, and other areas in Windows.
-
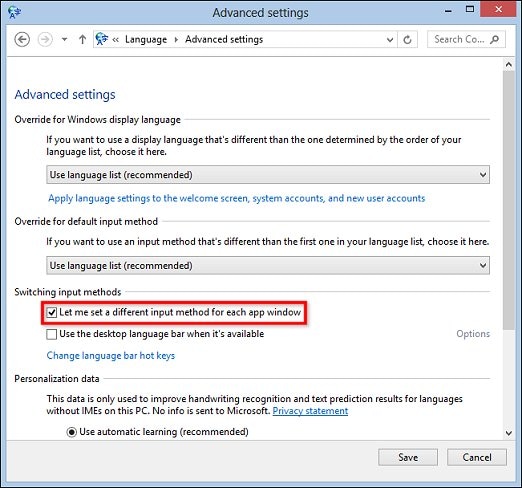
If you would like each app to use a specific keyboard, in the Language window, click Avant-garde settings.
-
Under Switching input methods, select the check box next to Let me set a different input method for each app window.
Figure : Input methods for individual apps
-
Click Relieve.
Applying the brandish language to more areas of Windows
Apply the language you lot installed to the Welcome screen and other accounts.
-
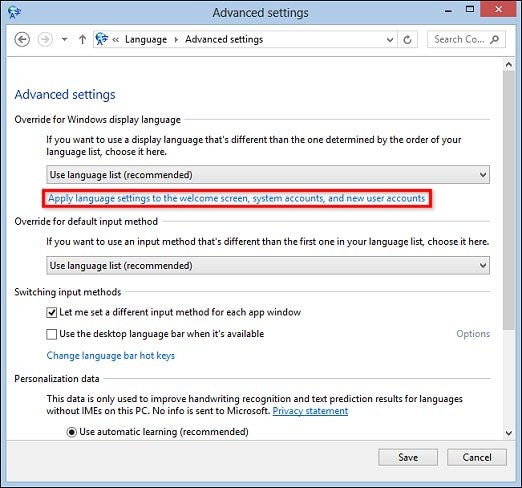
From the Language window, click Advanced settings.
-
Click Employ linguistic communication settings to the welcome screen, system accounts, and new user accounts.
Figure : Linguistic communication Advanced settings
The Region window opens.
-
On the Authoritative tab, click the Copy settings button.
Figure : Copy settings in Region window

-
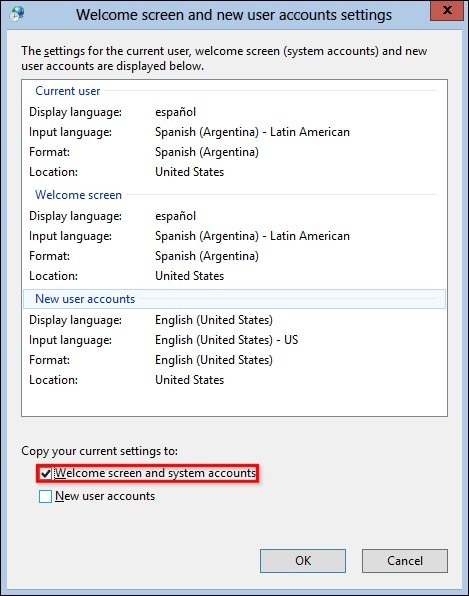
On the Welcome screen and new user accounts settings window, select the check box adjacent to Welcome screen and system accounts to utilize your display linguistic communication choice to the Welcome screen and organisation accounts.
Figure : Welcome screen settings
-
If that is the simply modify you lot desire to make, click OK.
-
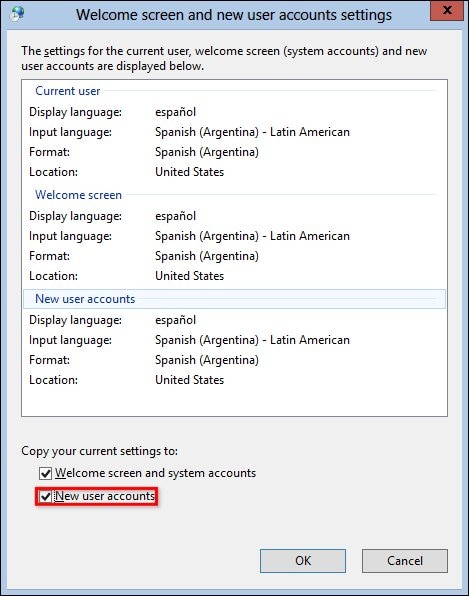
If y'all likewise want to use your brandish language choice to all new user accounts, select the check box next to New user accounts.
Figure : New user accounts settings
-
Click OK on Welcome screen and new user accounts settings window.
-
Click OK on the Region window.
-
If prompted, click Restart.
Uninstalling language packs
Installing multiple language packs might bear upon how much hard disk drive space is available, as well equally system functioning. Follow the steps below to uninstall an unneeded linguistic communication pack.
-
Motility the mouse arrow to the lower left corner of the screen, right-click, and select Control Panel from the menu.
The Control Console window opens.
-
Under Clock, Language, and Region, click Add a language.
The Linguistic communication window opens.
-
Click Options adjacent to the language you lot are uninstalling.
The Language options window opens.
-
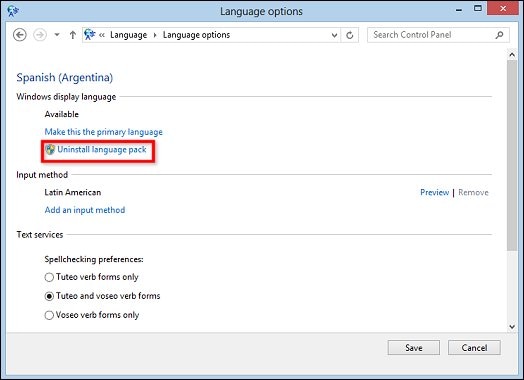
On the Language options window, click Uninstall language pack.
Figure : Language options window
-
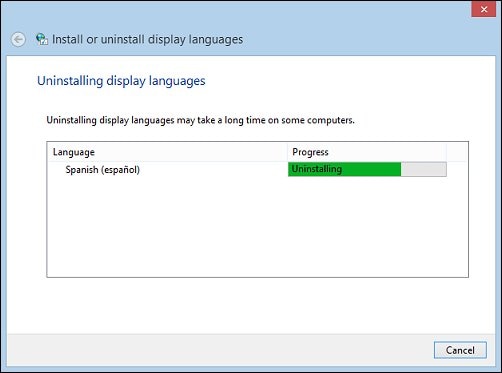
The Install or uninstall display languages window opens and Windows begins uninstalling the language. This might take several minutes.
Figure : Uninstall display languages
-
Once the language has finished uninstalling, click Restart at present when prompted.
The computer restarts.
-
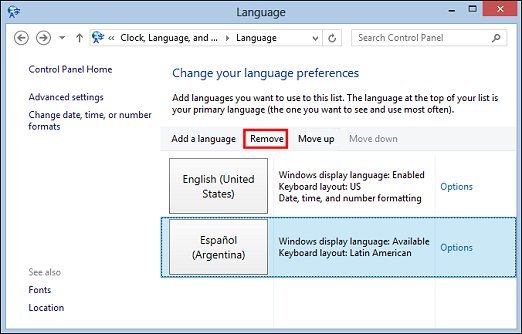
On the Language window, select the linguistic communication from the listing, so click Remove.
Figure : Remove a language from a listing of language preferences
-
If prompted, click Restart.
-
Open the Language window, and click Avant-garde settings.
-
Click Use language settings to the welcome screen, system accounts, and new user accounts.
The Region window opens.
-
On the Administrative tab, click the Copy settings button.
-
On the Welcome screen and new user accounts settings window, select the check boxes side by side to Welcome screen and system accounts and New user accounts.
-
Click OK on Welcome screen and new user accounts settings window.
-
Click OK on the Region window.
-
If prompted, click Restart.
-
The language and all associated input methods are at present removed from the user account.
Source: https://support.hp.com/ee-en/document/c03471369
Posted by: mccoypaten1955.blogspot.com
0 Response to "How To Install Language Pack Windows 8"
Post a Comment